Nginx安装及升级
微冷 2021/9/9 nginx
# 一、简述
- 中文官网 (opens new window)
- 下载地址 (opens new window)
- Nginx配置工具 (opens new window)
- 参考安装教程 (opens new window)
# 二、下载
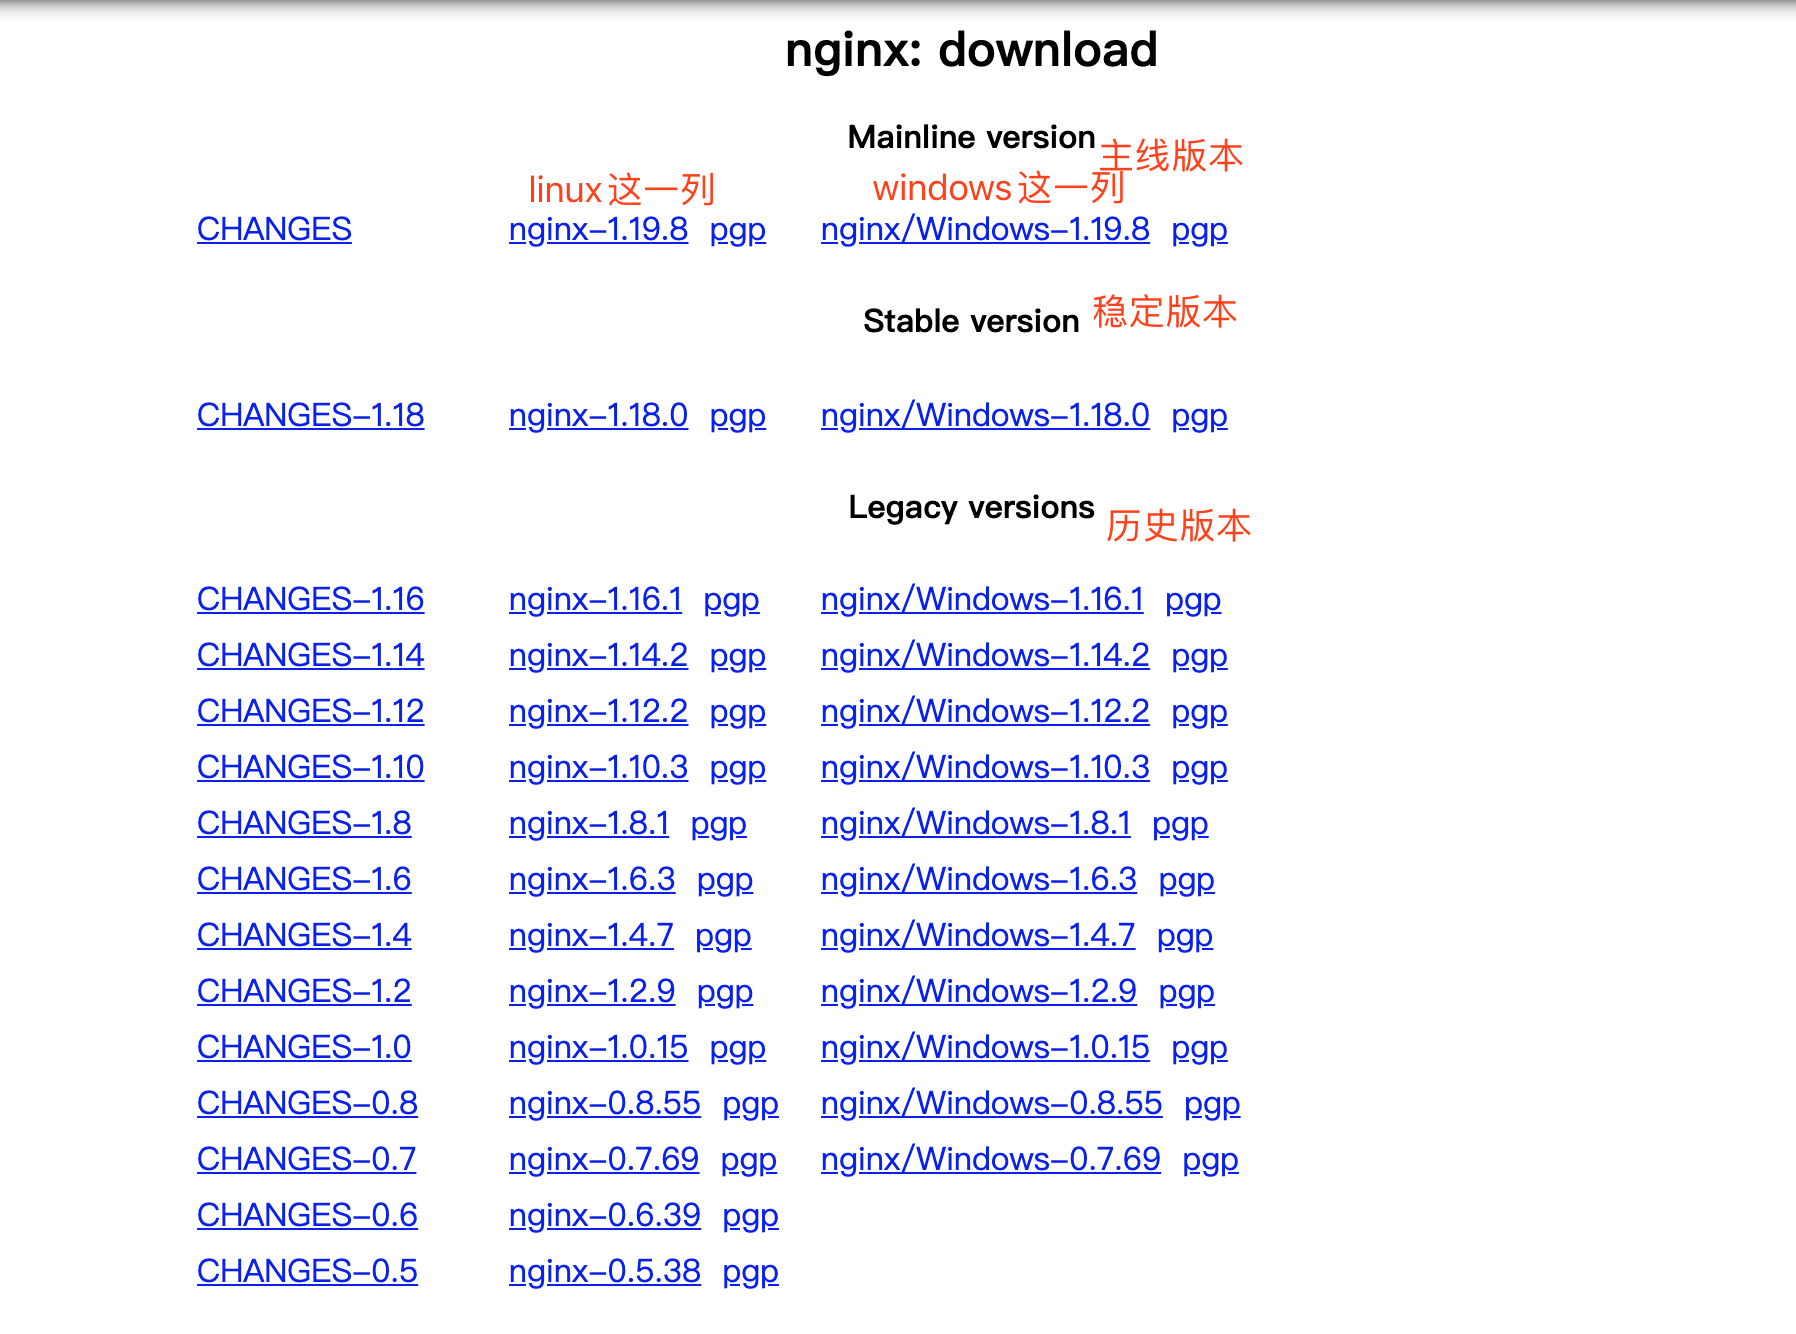
打开下载地址,http://nginx.org/en/download.html,按照下图说选择自己需要的版本

# 三、安装Nginx依赖环境
已安装的跳过
$ yum install -y gcc-c++
$ yum install -y pcre pcre-devel
$ yum install -y zlib zlib-devel
$ yum install -y openssl openssl-devel
1
2
3
4
2
3
4
如果是debain内核服务器使用以下命令
 sudo apt-get install build-essential
 sudo apt-get install libpcre3 libpcre3-dev openssl libssl-dev libperl-dev
1
2
2
# 四、安装Nginx
# 4.1、安装
# 解压已经下载的软件包,并进入到解压目录
$ tar -zxf nginx-1.19.2.tar.gz
$ cd nginx-1.19.2
# 配置Nginx编译模块,--with-stream 支持stream,可以做数据库端口转发; --with-http_ssl_module支持https请求;
$ ./configure --with-stream --with-http_ssl_module
# 编译并安装(如果是覆盖安装的话,记得备份原来的nginx.conf)
$ make & make install
1
2
3
4
5
6
7
2
3
4
5
6
7
如果想配置安装路径不使用默认的安装位置,使用--prefix=指定的路径 可能会缺少压缩依赖,下载安装即可wget http://www.zlib.net/zlib-1.2.11.tar.gz
tar -zxf zlib-1.2.11.tar.gz
cd zlib-1.2.11
./configure
make
make install
1
2
3
4
5
2
3
4
5
$ ./configure --prefix=/usr/local/webserver/nginx --with-stream --with-http_ssl_module
$ make & make install
1
2
2
# 4.2、执行文件及配置文件
如果按照以上步骤安装完成后:
- nginx安装路径:/usr/local/nginx
- nginx执行文件位置:/usr/local/nginx/sbin/nginx
- nginx配置文件位置:/usr/local/nginx/conf/nginx.conf
# 4.3、建立软链接
建立软连接后全可在任意位置输入nginx执行nginx命令
$ ln -s /usr/local/nginx/sbin/nginx /usr/bin/nginx
1
# 五、Nginx常用命令
# 检查配置文件nginx.conf的正确性
$ nginx -t
# 启动nginx
$ nginx
# 启动时指定配置文件
$ nginx -c 配置文件路径
# 重新载入配置文件(重启)
nginx -s reload
# 停止,此方式相当于先查出nginx进程id再使用kill命令强制杀掉进程
$ nginx -s stop
# 停止,此方式停止步骤是待nginx进程处理任务完毕进行停止(建议)
$ nginx -s quit
1
2
3
4
5
6
7
8
9
10
11
12
2
3
4
5
6
7
8
9
10
11
12
# 六、升级Nginx
如果nginx被扫描除了漏洞需要升级,不要卸载重装!!!覆盖安装(升级)即可
下载新版本的nginx,参考上面⬆️
- 查看当前已安装哪些
$ nginx -V
nginx version: nginx/1.19.2
built by gcc 4.8.5 20150623 (Red Hat 4.8.5-39) (GCC)
built with OpenSSL 1.0.2k-fips  26 Jan 2017
TLS SNI support enabled
configure arguments: --with-stream --with-http_ssl_module --add-module=/home/soft/fastdfs-nginx-module/src/
1
2
3
4
5
6
2
3
4
5
6
记录下第6行configure arguments:后面的内容,后面会用到 2. 备份原来的配置文件
$ cd /usr/local/nginx/conf
$ cp nginx.conf nginx.conf.bak
1
2
2
- 重复上面的安装Nginx步骤
- 进入到安装目录会发现已经覆盖安装了,并且自动将原来的备份成了nginx.old
$ cd /usr/local/nginx/sbin
$ ll
总用量 13744
-rwxr-xr-x 1 root root 7036232 9月  17 2020 nginx
-rwxr-xr-x 1 root root 7036232 9月  17 2020 nginx.old
1
2
3
4
5
2
3
4
5
- 检查配置文件是否覆盖,如果被覆盖恢复原来备份的配置文件
$ cd /usr/local/nginx/conf
# 查看配置文件内容,检查完退出(按esc键盘进入命令格式,输入:q!然后回车)
$ vim ./nginx.conf
# 如果被修改,恢复原来备份
$ mv nginx.conf nginx.conf.del
$ mv nginx.conf.bak nginx.conf
1
2
3
4
5
6
2
3
4
5
6
- 重启nginx
nginx -s reload
1
# 七、Nginx常见配置
# 八、Windows下Nginx使用
- 启动
D:\soft\nginx>start nginx
或者
D:\soft\nginx>nginx.exe
或者
双击nginx.exe
1
2
3
4
5
2
3
4
5
建议使用第一种;第二种限制cmd窗口一直处于执行状态,不能进行其他操作。第三种接双击nginx.exe,会导致修改配置后重启、停止nginx无效,需要手动关闭任务管理器内的所有nginx进程
1.1 指定配置文件启动
start nginx -c conf/nginx.conf
1
- 关闭
nginx -s stop  :快速停止nginx
nginx -s quit  :完整有序的停止nginx
某些版本以上命令不能关闭,所以强制关闭
taskkill /f /im nginx.exe > null
1
2
3
4
2
3
4
- 重启
nginx.exe -s reload
1
留言: